My Advent calendar idea was inspired by a couple things I saw on Pinterest. First, this amazing Christmas tree of vintage ornaments hung on a screen:
 |
| pinned here |
 |
| via my fav bloggers, pinned here |
On my way home from work, I stopped at Goodwill and picked up a 16" x 20" botanical print for $7. Then I went to Target and picked up two sets of colorful ornaments.


Because it was nighttime and c-c-cold outside, I started painting the ornaments first. Using Martha Stewart silver craft paint, I labeled the ornaments #1-24.

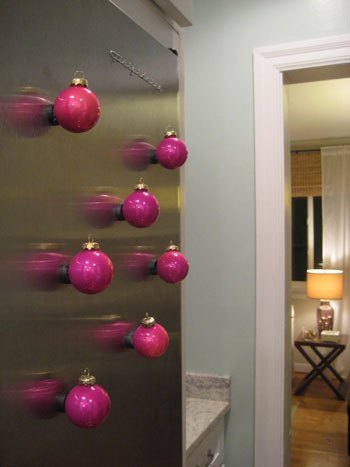
After the ornaments dried, I used a hot glue gun to attach a magnet to the back of each one.


The next day, I took the glass out of the picture frame, set up shop in the back yard, and spray painted the frame. Learning from a previous projects, I made sure that I primed the frame.


After the frame was painted, I went to Home Depot to get some sheet metal and have it cut. Much to my dismay, the only piece of metal big enough for my 16 x 20" project was $20! No thank you. Instead of using sheet metal, I decided to go to Target and find a magnetic board that might fit. Luckily Target had a number of 16 x 12" magnetic dry erase boards, and I picked up the cheapest one for $7.


The frame whiteboard didn't fit snuggly in the frame, so I used a hot glue gun to glue the white board to the backing of the original frame. Once I had my magnetic surface, I cut my fabric to size.
I used spray adhesive to attach the fabric to the whiteboard, spraying both the white board and the fabric.


Then I cut a piece of yarn and placed it near the top of the bag:

The first seam I sewed was the drawstring pocket. Leaving the yarn in there made life SO much easier than if I had to pull the yarn through the pocket.


Then I folded the panel in half with the wrong side of the fabric facing me. I sewed along the two open unfinished edges. I was careful not to sew into the drawstring area so that I didn't render the drawstring useless.

Once I was finished sewing the pouch, I knotted the yarn and turned the bag from inside out to outside in.


Using the same silver Martha Stewart paint, I painted numbers on all 24 pouches. To prevent the paint from bleeding through the fabric to the back of the pouch, I used pieces of cardboard and pieces of a shopping bag in between the layers.


After the ornaments dried, I used a hot glue gun to attach a magnet to the back of each one.
The next day, I took the glass out of the picture frame, set up shop in the back yard, and spray painted the frame. Learning from a previous projects, I made sure that I primed the frame.
After the frame was painted, I went to Home Depot to get some sheet metal and have it cut. Much to my dismay, the only piece of metal big enough for my 16 x 20" project was $20! No thank you. Instead of using sheet metal, I decided to go to Target and find a magnetic board that might fit. Luckily Target had a number of 16 x 12" magnetic dry erase boards, and I picked up the cheapest one for $7.
I unscrewed the frame around the whiteboard and pried it off with a screwdriver, which left me with this result:
The frame whiteboard didn't fit snuggly in the frame, so I used a hot glue gun to glue the white board to the backing of the original frame. Once I had my magnetic surface, I cut my fabric to size.
I used spray adhesive to attach the fabric to the whiteboard, spraying both the white board and the fabric.
Once the fabric was attached, I squeezed a bead of tacky glue on the inside of the frame. To make sure the board was secure, I also used upholstery tacks to hold the board in place.
With the board done, I set out to make fabric pouches for each ornament. Using my sewing machine and some utility fabric I found for about $5/yard, I sewed little 3 x 3" ornament pouches.
First I cut 24 4 x 7" panels of fabric:
Then I cut a piece of yarn and placed it near the top of the bag:
The first seam I sewed was the drawstring pocket. Leaving the yarn in there made life SO much easier than if I had to pull the yarn through the pocket.
Then I folded the panel in half with the wrong side of the fabric facing me. I sewed along the two open unfinished edges. I was careful not to sew into the drawstring area so that I didn't render the drawstring useless.
Once I was finished sewing the pouch, I knotted the yarn and turned the bag from inside out to outside in.
Using the same silver Martha Stewart paint, I painted numbers on all 24 pouches. To prevent the paint from bleeding through the fabric to the back of the pouch, I used pieces of cardboard and pieces of a shopping bag in between the layers.
To display the bags of ornaments, I braided six strands of yarn together (3 strands doubled up), hung strand over a nail, and used tiny clothespins to attach the bags to the strand.
I'm excited about the end result! I even glued the bow at the top of the board to a magnet, so that it's completely removable. That way I can use the magnet board throughout the year!
Has anyone else made a cool Advent calendar this year? I think they're a really fun Christmas activity with so many different way of making them your own.